07 / INSIDE THE POS
Technical overviewThe counter.
From the operator’s side.
From the first scan to the closing report, see the actual Vaya POS workspaces for cashiers, managers, and technicians. Select any capture to inspect the original image.
Actual September 2026 captures. Displayed amounts, dates, and connection states are the records shown at the time of capture.
01 / CHECKOUT
A working surface
for a working counter.
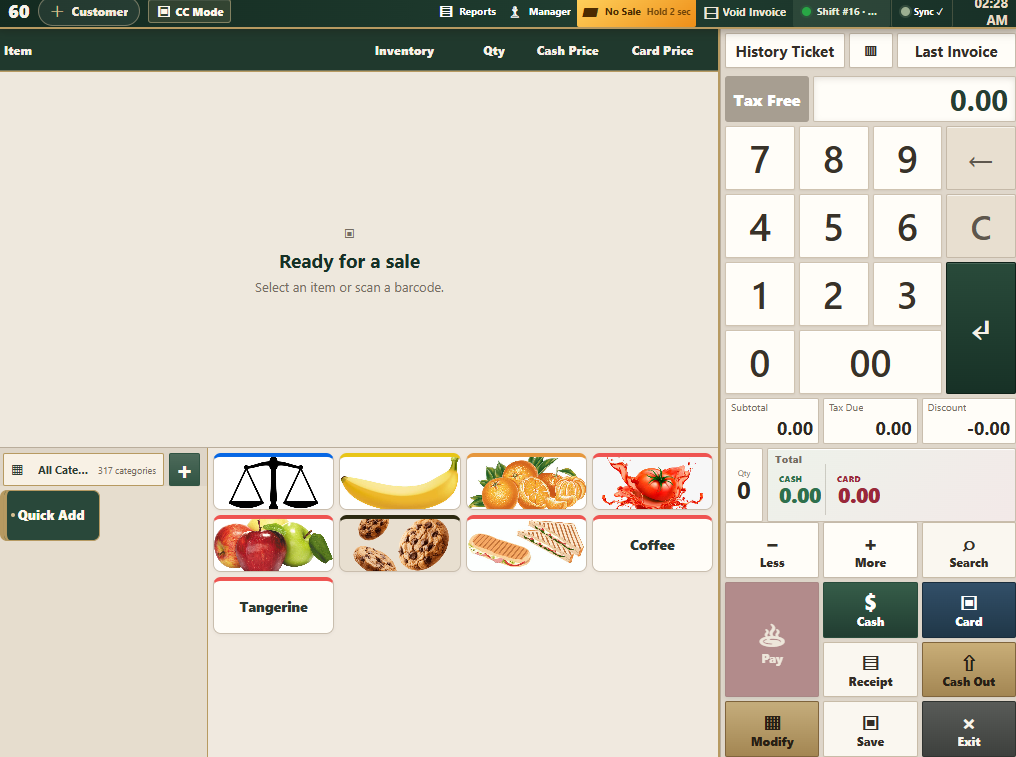
The current sale, product shortcuts, numeric entry, and tender controls share the cashier’s main workspace. Product images make familiar quick-menu items easy to recognize at the counter.
This register is ready for its next sale. Cash and card totals are visible together, while receipt, cash-out, modify, and save actions stay within reach.
 Inspect screen
 Scan or select
Barcode input and quick-menu products feed the same working basket.
See both price bases
Configured cash and card totals appear beside the tender controls.
Keep the lane visible
Shift, sync, history, and manager entry points remain in the register workspace.
02 / HISTORY TICKET
The store view.
The individual sale.
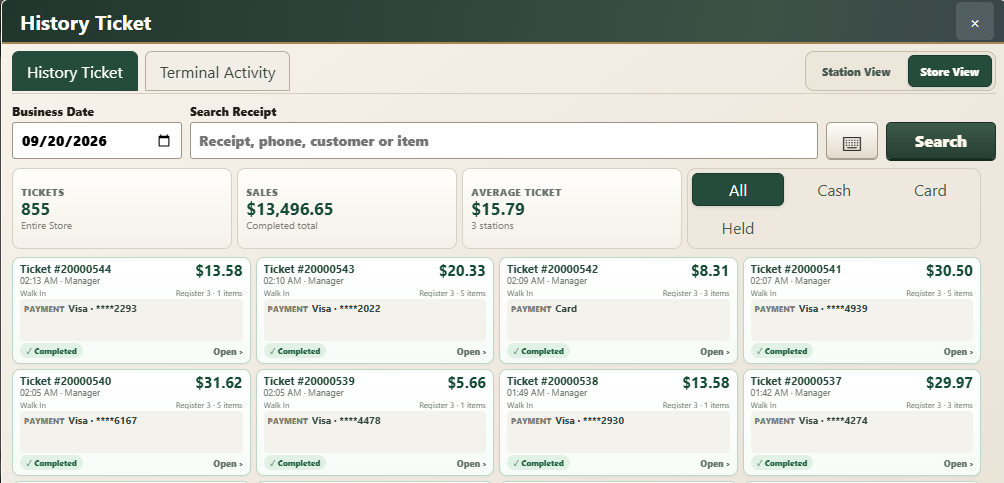
Store View brings the selected business date into one place. The capture shows three stations, summary cards, receipt search, and completed tickets carrying their register identity.
Station and store scope are explicit. A manager can start with the total, then open the ticket that needs attention.
 Inspect screen
 Station or store
The selected scope defines which records the summary represents.
Find the receipt
The search field accepts receipt, phone, customer, or item information.
Completed or held
Held work remains a separate filter from completed-sale records.
03 / TERMINAL ACTIVITY
Inspect the payment
on its own terms.
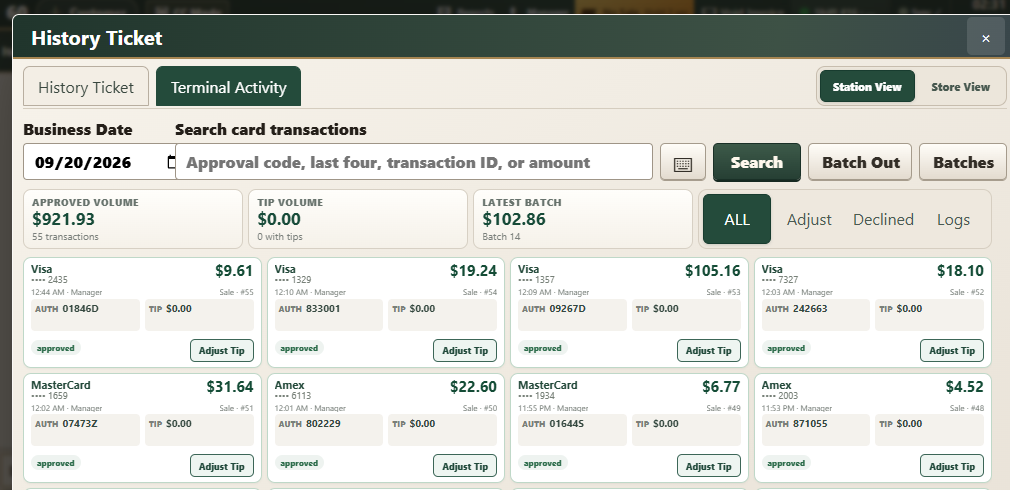
Terminal Activity gives payment operations their own workspace: approval records, masked card references, tip adjustments, and batch controls.
The selected Station View matters. An approval belongs to a terminal operation; the completed invoice remains a separate record to reconcile.
 Inspect screen
 Trace the approval
Payment records expose the reference and result associated with the terminal operation.
Keep tips attributable
Adjust Tip is associated with an individual payment record.
Inspect settlement context
The latest batch and batch-history controls sit alongside payment activity.
04 / REGISTER SYNCHRONIZATION
Local registers.
A visible shared state.
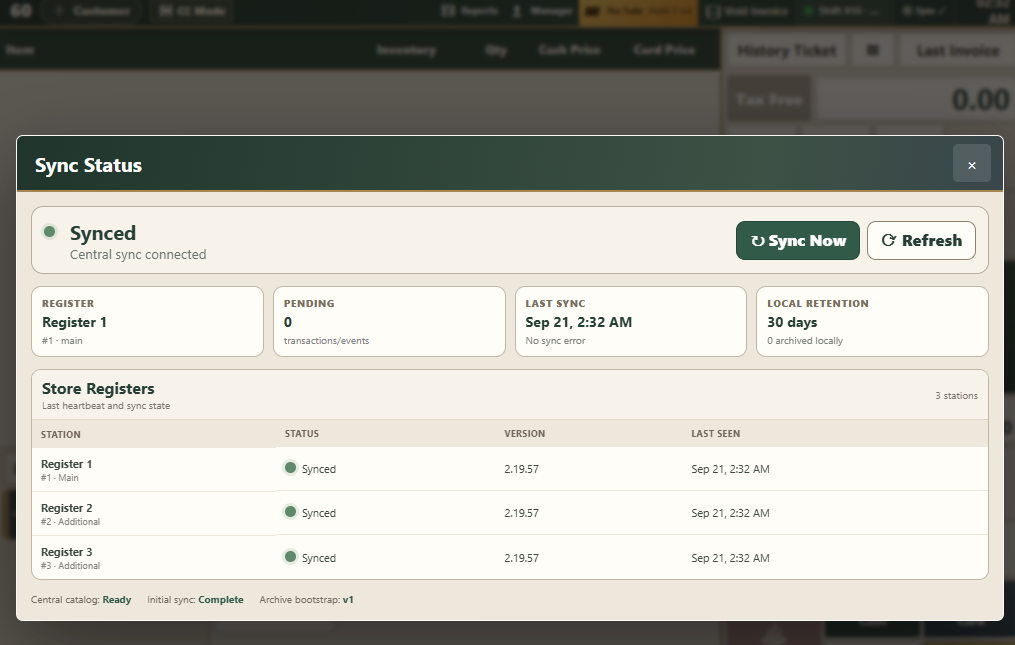
The sync screen puts Register 1’s pending count, last synchronization, and local retention beside a list of the store’s three registers.
Each row carries a version, last-seen timestamp, and reported sync state. That gives a technician context when checking whether the shared view has caught up.
 Inspect screen
 Know what is pending
The local pending count identifies work still waiting to synchronize.
Know which lane
Main and additional registers retain their individual identities.
Read the timestamp
A last-seen time gives a connection indicator the context it needs.
05 / MANAGER REPORTING
Compare the lanes.
Follow the tender.
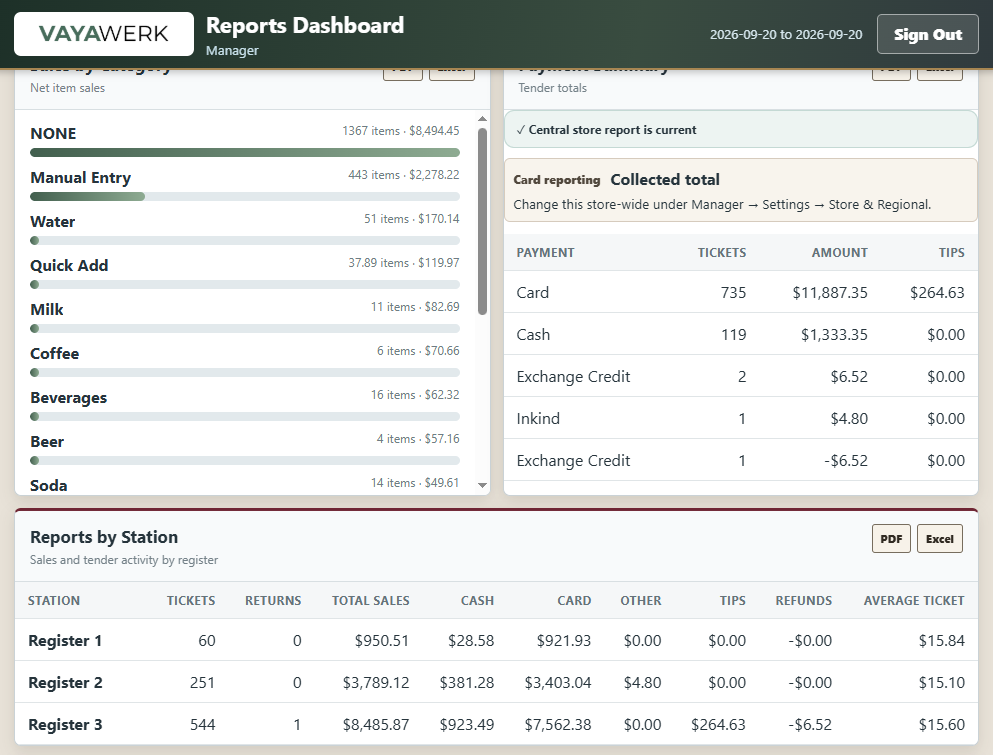
The reporting dashboard brings category sales, payment summaries, and a station breakdown into the manager’s view.
Reports by Station separates tickets, returns, cash, card, other tender, tips, refunds, and average ticket. Export controls support taking the report into the next part of the review.
 Inspect screen
 Review category activity
Sales-by-category rows show the product grouping behind the totals.
Separate the collection methods
Payment summary rows distinguish amounts and tips by tender type.
Compare register activity
Each lane’s figures remain inspectable within the store report.
06 / END-OF-DAY REVIEW
Close with
the breakdown in view.
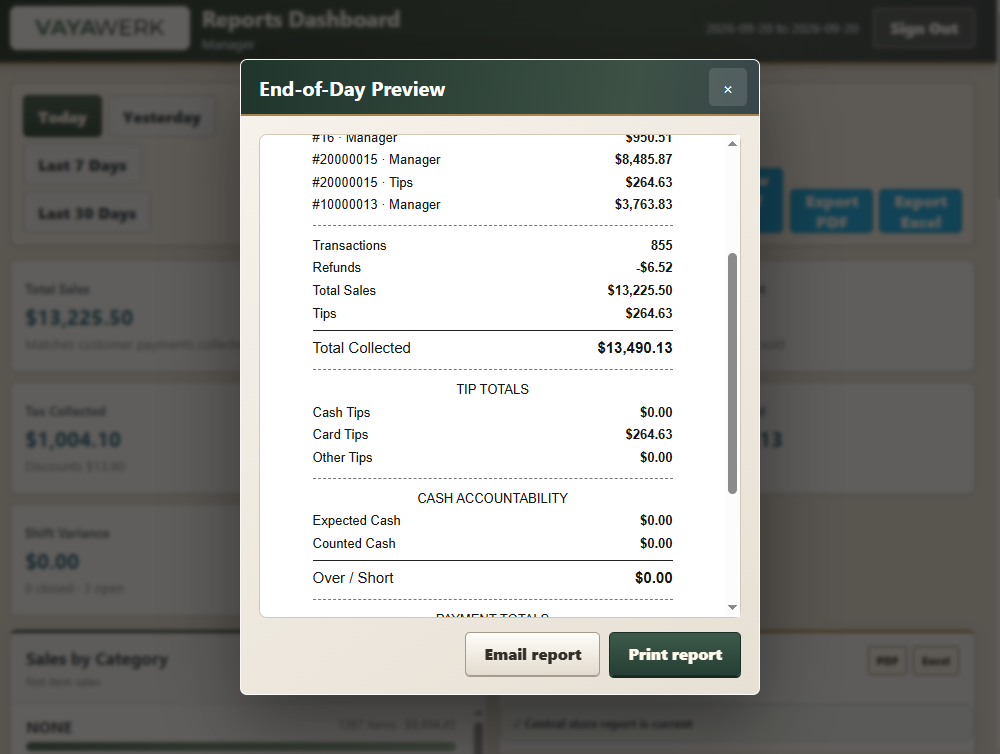
The end-of-day preview presents transaction counts, refunds, sales, tips, and collected totals together with cash-accountability fields.
The manager can inspect the report before choosing the print or email action. Report generation and successful delivery remain separate operations.
 Inspect screen
 The selected reporting scope, business date, and payment basis define a total. Compare those settings before comparing numbers across different workspaces.
Understand the business-day boundary07 / LOCAL DEVICE ADMINISTRATION
Bring system work
into the appliance.
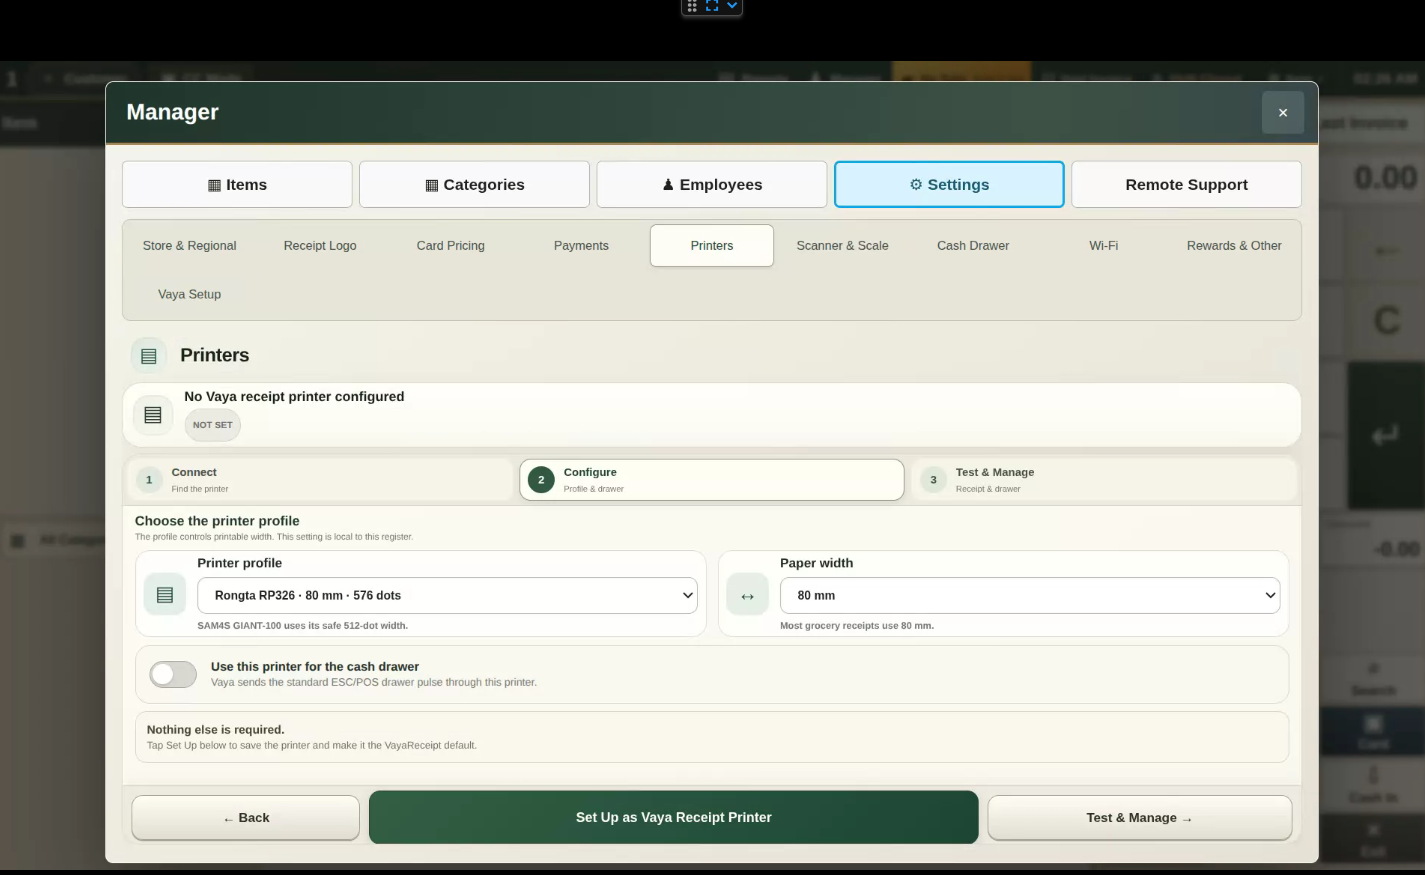
Printer setup is organized around three steps: Connect, Configure, and Test & Manage. The configuration screen exposes the printer profile, paper width, and printer-driven cash-drawer option.
These are manager controls inside the POS. A technician can identify the intended configuration before setting it as the Vaya receipt printer and testing the physical output.
 Inspect screen
 Match the output
The selected profile defines the intended printer width and output characteristics.
Choose the device path
The printer-driven drawer option is distinct from an HP stand’s USB drawer connection.
Test the actual lane
Saving settings is followed by verifying receipt output and the installed drawer path.